Silly me! I didn't write these recipes down! Oops! But you will get to see some of what I have been eating as of late.
First up is this little diddy. It's Brown Rice, Chickpeas, Tomatoes, and Seasonings that I made last week. It was tasty. I literally just threw it together!
It's been a week or a few weeks of craziness and I just jotting down my recipes totally slipped my mind!
Yup! There were various dips, too! Like this one! I can't recall everything I put in it but I'm sure it was Cashews, Red Bell Pepper, Smoked Paprika, and probably Lemon Juice at the very least.
I really thought I was going to make at least a couple of soups because it has been so cold this week but I didn't have time. As I type this it's -2F actual and wind chills in the area made it feel like -25 to -30F. YIKES!
Here's another dip I make last weekend. I used the last little bit of vegan mayo I had in the frig, garlic, smoked paprika, lemon juice, a handful of cashews - were probably involved - and most likely some black sea salt - but just a pinch.
What dips have you been trying lately?
I told you I was going to start doing monthly Vision Boards. Here is my first one and it's a mish mash of things but then again I think that what Vision Boards are mostly. Things you want to do - things to inspire you - things you want to remember - and things you want to work towards!
This month...Start Each Day With A Grateful Heart was the re-used calendar visual I grabbed from my old 2017 calendar in my office. Instead of throwing old calendars away I re-use them as other art in some way, shape, or form. I added a lot of peace, love, laughter type things, too! Also time to play, do yoga, smile, socialize, etc.
While cleaning last weekend this was one of the many past projects I found so I thought I would rehang it on the wall.
As you may have noticed I reuse clothes hangers to hang artwork.
I have also been experimenting with my old alcohol inks again. I hope to post some of those projects down the road, too!
I was able to reach a mini goal of setting aside a space for my yoga again but I have yet to actually do it. Perhaps this coming week I will be able to check that off my list, finally.
Things seem to be coming along with my mini-goals.
Another mini-goal for next week is to get to the post office and mail more coin swaps!
I'm having fun with the site I found and have already doubled my collection in 2 weeks. There is a local shop I have found a lot of them for cheap and I got my firs swap in today, actually!
I currently have coins from 61 countries! YAY!
Showing posts with label Reuse. Show all posts
Friday, January 5, 2018
Wednesday, December 9, 2015
MidWeek Munchies & What I Wore Wednesday!
I thought I would kick things off with the NEW Earrings I got in the mail! Woot! I will be doing a more lengthy review on each one of these in the near future but aren't they COOL? The company is called Green Tree Jewelry and they are made from renewable and recycled materials!
When it comes to MidWeek Munchies I don't have too much to report but here is what I do have to share this week! First up is BRAZIL NUTS! I really need to grab some more cashews but I'm trying to hold out for a better price!
One of my favorite dressings EVER!
I needed to grab some more ACV!
And I also needed some more Agave Nectar. This time I opted for the clean Agave from Ojio.
And I splurged for some trail mix!
I hope you will participate in this week's MWM! If you have anything VEGAN you would like to share and link up with we welcome you and your posts! It can be a grocery store haul, garden or farmers market trip, online purchase, or anything you made and munched on that happens to be vegan!
Friday, August 21, 2015
The Bellamy Brothers Concert
Wednesday of last week during the Warren County Fair the featured band to perform was...The Bellamy Brothers!
I helped with the flow of the Meet N Greets prior to the concert and then helped with various things during the show so I didn't get to see much of their performance but the crowd LOVED them! The 'house' was PACKED the whole time!
Here's a shot from the audience that a friend of mine took.
I also helped sell merchandise towards the end of the show.
New this year - is the front of the stage. The wood is actually 29 years old and reused/repurposed from the Motor Sports Arena and was sanded and treated and it looks amazing! The Cornplanter Stage Sign is new this year, too!
After the show the 'brothers' stopped over at the Entertainment Office (a new addition during last years fair) and signed the wall and a few other promotional signs we will be hanging on the walls in the coming weeks.
These guys sure were busy prior to visiting our county fair! In about a week they traveled from Switzerland to Germany to Denmark to Norway and then to Pennsylvania.
I will be posting at least one more time today so be on the look out for that. I have 2 more concerts to report on and will post in between other My Blissful Journey posts, too!
Wednesday, August 19, 2015
Domestic Displays, Freebies, and Dobson Fly
I still have a few posts-worth from Fair Week but it just occurred to me I have a slew of other things I need to blog about and FAST! So I will most likely be doubling up on posts for a while!
Check out this shot of the jams, jellies, and other canning goods from the week of fair in the Domestic Buildings!
With all of the rides, animals, and live concerts at fair I think sometimes the Domestic Displays aren't as talked about but with our county fair they are celebrated NICELY! There were TONS of crafts as well. A family friend of ours won 1st and 2nd place for some of his veggies, too! I loved seeing walls and walls of produce whether it be fresh or canned.
What's your favorite thing to can?
Tuesday - the day of our headlining concert - is the day we usually give away a few thousand plastic travel mugs from a local company that has become known world wide.
Here's a photo of our mug giveaway! People go CRAZY for them!
Because the company increases their 'going green' practices each year we had TONS of different kinds of mugs to give away this time around. Many of their unused mugs are melted down and the plastic recycled/reused so they don't store as many of them any more like they used to.
While interviewing some local and state politicians I noticed this weird bug directly behind them. The photo doesn't do it justice, tho, the bug was about 5 or 6 inches in length. Longer than my finger. At the top of it's head you can see it has claws!!!! It has pretty scary but we left it alone for the most part and the next day it was gone on its own accord.
From the research I've done it seems to be a Female Dobson Fly,
What was weird was they are known as night time bugs but this was seen in the middle of the day.
I also found out that there are about 60 different species of Dobson Flies. Pretty interesting stuff.
If I remember correctly Opal's daughter used to like bugs - perhaps she will get a kick out of this one, too!
Check out this shot of the jams, jellies, and other canning goods from the week of fair in the Domestic Buildings!
With all of the rides, animals, and live concerts at fair I think sometimes the Domestic Displays aren't as talked about but with our county fair they are celebrated NICELY! There were TONS of crafts as well. A family friend of ours won 1st and 2nd place for some of his veggies, too! I loved seeing walls and walls of produce whether it be fresh or canned.
What's your favorite thing to can?
Tuesday - the day of our headlining concert - is the day we usually give away a few thousand plastic travel mugs from a local company that has become known world wide.
Here's a photo of our mug giveaway! People go CRAZY for them!
Because the company increases their 'going green' practices each year we had TONS of different kinds of mugs to give away this time around. Many of their unused mugs are melted down and the plastic recycled/reused so they don't store as many of them any more like they used to.
While interviewing some local and state politicians I noticed this weird bug directly behind them. The photo doesn't do it justice, tho, the bug was about 5 or 6 inches in length. Longer than my finger. At the top of it's head you can see it has claws!!!! It has pretty scary but we left it alone for the most part and the next day it was gone on its own accord.
From the research I've done it seems to be a Female Dobson Fly,
What was weird was they are known as night time bugs but this was seen in the middle of the day.
I also found out that there are about 60 different species of Dobson Flies. Pretty interesting stuff.
If I remember correctly Opal's daughter used to like bugs - perhaps she will get a kick out of this one, too!
Tuesday, June 10, 2014
Rooftop Garden NOW Outside!
Hello everyone! I'm a little behind on visiting your blogs but I hope to do that very soon!
My days have been jam packed with writing - not only at work - but at the various sites I contribute to - as well as HOME issues. My brother in law had to have emergency surgery a few weeks ago. My husband has been having stomach issues again. We've been in and out of vet's offices, etc.
Because I try and keep this blog positive and optimistic - I have been doing more and more reflecting. Because of the things around me - it's put some things into prospective. These issues continue to speak to me and tell me just how important diet and physical activity is and it's never to late to make changes in your life.

Everything is a reminder to show LOVE to those you hold dear but also to those you may not know. Be compassionate and understanding as much as possible.
I've been thinking about the small things in life, lately, too! The little things that make a difference in each day. The tiniest of occurrences that put a smile on ones face.

One of the MANY things I am thankful for and interested in these days is the progress of our Container Garden and Rooftop Garden Projects that myself and a few co-workers have been working on.
You can see some recent photos throughout this post! Sure...some attempts have been better than others - but - you won't know unless you TRY - right?
In the first photo you can see that we have hardened off many of the indoor plants and they are now outside full time. Many of them remain in the containers and/or reused/recycled items I've mentioned in previous posts. By keeping them in containers we are able to move them if need be. One thing we have yet to find out is the impact the hot roof will have on certain plants. If this is an issue we are able to move each containers location to another part of the roof and/or we may put down reused plastic tarps or shelves underneath to cut down on the heat/temperature. In the 2nd photo you can see some of what we are trying to grow a bit better.
From left...we have one of the Dragon's Tongue Bean plants. We kept about 6 other plants indoors. I think they are thriving better inside actually. The difference I have noticed with ours is that the indoor Dragon's Tongue are more plentiful and the yields are higher. The individual beans are larger, too. However...this outside plant is smaller but more colorful. If you have read my previous posts about the Dragon's Tongue you may remember that when they are mature they are purple and green in color. They are gorgeous! The flavor is amazing, too! We have harvested some already with more on the way! They are EXTREMELY Crispy and Juicy! YUM!
Next up we have some Spinach growing and regular green and white Swiss Chard as well as some Bright Lights Swiss Chard. We are also attempting some regular spinach. On the far end you will see a few other the smaller Brussels Sprout Plants we are trying. These aren't growing as well as the ones we are growing in the orange buckets which I will be showing you in a bit. We thought we would try a few of them in a different section just for kicks.
In the next photo you will see a table along the back with items on top. We have everything from Beans and Peas to Basil and Chives. We have some cucumbers and peppers, too! In the smaller white containers - for the time being - we are using them to catch rain water. We also have a few tomato plants and sunflowers started.
You can also see we have some stairs. We have more chives on the stairs, a few attempts at onions - which may or may not work - time will tell, and we have more space to expand!
Also under the stairs we have some leafy greens. We have the Spicy Mesclun Mix as well as the Sweet Mix. Both have been doing VERY well! With the Sweet Mix I have already gotten 4 or 5 salads out of it and when I looked at it again this morning it looks like I could pick another lunch-size salads worth! Since we took this photo we have re-arranged a few things and the peas are no longer in that spot. We have Kale going there instead, now.
Off to the right of this last photo you can see our STRONGER Brussels Sprouts in the orange buckets. Next to that is our MASSIVE Broccoli that is sprouting up VERY nicely! We are stoked!
We decided to keep our Little Marvel Peas INSIDE along with the other Dragon's Tongue Beans. We have some Rosalita Lettuces we are trying to bring back from the brink and a few other things in our indoor container garden, too! I will try and share that in the future. As for the house - we won't be doing much after all. I did, however, find a Cherry Tomato Hanging Basket from a local greenhouse and purchased that as well as a Hanging Strawberry Plant. Our Hosta's are taking over 3 sections of our yard! I'll be sure to share photos of those with you soon, too!
My days have been jam packed with writing - not only at work - but at the various sites I contribute to - as well as HOME issues. My brother in law had to have emergency surgery a few weeks ago. My husband has been having stomach issues again. We've been in and out of vet's offices, etc.
Because I try and keep this blog positive and optimistic - I have been doing more and more reflecting. Because of the things around me - it's put some things into prospective. These issues continue to speak to me and tell me just how important diet and physical activity is and it's never to late to make changes in your life.

Everything is a reminder to show LOVE to those you hold dear but also to those you may not know. Be compassionate and understanding as much as possible.
I've been thinking about the small things in life, lately, too! The little things that make a difference in each day. The tiniest of occurrences that put a smile on ones face.

One of the MANY things I am thankful for and interested in these days is the progress of our Container Garden and Rooftop Garden Projects that myself and a few co-workers have been working on.
You can see some recent photos throughout this post! Sure...some attempts have been better than others - but - you won't know unless you TRY - right?
In the first photo you can see that we have hardened off many of the indoor plants and they are now outside full time. Many of them remain in the containers and/or reused/recycled items I've mentioned in previous posts. By keeping them in containers we are able to move them if need be. One thing we have yet to find out is the impact the hot roof will have on certain plants. If this is an issue we are able to move each containers location to another part of the roof and/or we may put down reused plastic tarps or shelves underneath to cut down on the heat/temperature. In the 2nd photo you can see some of what we are trying to grow a bit better.
From left...we have one of the Dragon's Tongue Bean plants. We kept about 6 other plants indoors. I think they are thriving better inside actually. The difference I have noticed with ours is that the indoor Dragon's Tongue are more plentiful and the yields are higher. The individual beans are larger, too. However...this outside plant is smaller but more colorful. If you have read my previous posts about the Dragon's Tongue you may remember that when they are mature they are purple and green in color. They are gorgeous! The flavor is amazing, too! We have harvested some already with more on the way! They are EXTREMELY Crispy and Juicy! YUM!
Next up we have some Spinach growing and regular green and white Swiss Chard as well as some Bright Lights Swiss Chard. We are also attempting some regular spinach. On the far end you will see a few other the smaller Brussels Sprout Plants we are trying. These aren't growing as well as the ones we are growing in the orange buckets which I will be showing you in a bit. We thought we would try a few of them in a different section just for kicks.
In the next photo you will see a table along the back with items on top. We have everything from Beans and Peas to Basil and Chives. We have some cucumbers and peppers, too! In the smaller white containers - for the time being - we are using them to catch rain water. We also have a few tomato plants and sunflowers started. You can also see we have some stairs. We have more chives on the stairs, a few attempts at onions - which may or may not work - time will tell, and we have more space to expand!
Also under the stairs we have some leafy greens. We have the Spicy Mesclun Mix as well as the Sweet Mix. Both have been doing VERY well! With the Sweet Mix I have already gotten 4 or 5 salads out of it and when I looked at it again this morning it looks like I could pick another lunch-size salads worth! Since we took this photo we have re-arranged a few things and the peas are no longer in that spot. We have Kale going there instead, now.
Off to the right of this last photo you can see our STRONGER Brussels Sprouts in the orange buckets. Next to that is our MASSIVE Broccoli that is sprouting up VERY nicely! We are stoked!
We decided to keep our Little Marvel Peas INSIDE along with the other Dragon's Tongue Beans. We have some Rosalita Lettuces we are trying to bring back from the brink and a few other things in our indoor container garden, too! I will try and share that in the future. As for the house - we won't be doing much after all. I did, however, find a Cherry Tomato Hanging Basket from a local greenhouse and purchased that as well as a Hanging Strawberry Plant. Our Hosta's are taking over 3 sections of our yard! I'll be sure to share photos of those with you soon, too!
Thursday, March 20, 2014
Indoor Gardening & Container Gardening - Getting a Game Plan & Starting
(I originally had this as a schedule post for tomorrow - but - I decided to move it up to today - and will tell you WHY - in the very near future!)
It has begun! The Indoor Gardening Process for our Rooftop Garden at work! YAY! Last Saturday - 3 of us came in and started our 'game plan'. We also started our first 'flight' of indoor 'from seed' attempts. As I mentioned in previous posts - we are reusing many items for this project.
In this first photo you will see that we are using 3 long and narrow wooden boxes. In these 3 boxes we are doing 3 different kinds of onions. One in each box. We are jokingly calling the middle one our "Ron Burgundy Onions" - they are really called RED Burgundy Onions...but all three of us thought they same thing.
We obtained these wooden containers from our 'junk room' at work. Prior to the 'junk room' these wooden boxes were holding old 45's. Since we will never be using those again since everything is digital we decided to reuse them and put them to work. The place I work is inside a very old building. A few rooms that are being used as storage and not for public use because I doubt they are up to code - are gems in themselves. There are OLD 'leftovers' from pre-1940 in there. One of the items is an old retail display case with plastic drawers...big enough to fit shoes in. There are roughly 30 of these. We used some of them in the photo above to catch the drainage water from the boxes. We also used them to prop up the wooden boxes so they could get more sun from the window. If you look in the 2nd photo you will see some small sections we are trying to start. If they work - we hope to transplant them. They are Brussels Sprouts. In the empty space between the two - we ended up putting two 1.5 gallon buckets. One with Carrots and the other one with Broccoli. We drilled holes in the bottom of each of those and put them in those clear plastic drawers as well.
On the other side of the room we are using old CD Jewel Case Holders - with holes on the back/bottom for drainage - and put in the clear plastic drawers. So far - mostly - in these we are doing various greens! Lettuces - all different colors and kinds - and Kale. We hope to have these indoors for about 4 to 6 weeks and then harden them off and take them outside. We have TONS of other plans but are going to space them out. As for the set up indoors...we ended up reusing old wood and surfaces to make the "tables" and hugged them up to each window. I will keep you posted on any progress!
It has begun! The Indoor Gardening Process for our Rooftop Garden at work! YAY! Last Saturday - 3 of us came in and started our 'game plan'. We also started our first 'flight' of indoor 'from seed' attempts. As I mentioned in previous posts - we are reusing many items for this project.
In this first photo you will see that we are using 3 long and narrow wooden boxes. In these 3 boxes we are doing 3 different kinds of onions. One in each box. We are jokingly calling the middle one our "Ron Burgundy Onions" - they are really called RED Burgundy Onions...but all three of us thought they same thing.
We obtained these wooden containers from our 'junk room' at work. Prior to the 'junk room' these wooden boxes were holding old 45's. Since we will never be using those again since everything is digital we decided to reuse them and put them to work. The place I work is inside a very old building. A few rooms that are being used as storage and not for public use because I doubt they are up to code - are gems in themselves. There are OLD 'leftovers' from pre-1940 in there. One of the items is an old retail display case with plastic drawers...big enough to fit shoes in. There are roughly 30 of these. We used some of them in the photo above to catch the drainage water from the boxes. We also used them to prop up the wooden boxes so they could get more sun from the window. If you look in the 2nd photo you will see some small sections we are trying to start. If they work - we hope to transplant them. They are Brussels Sprouts. In the empty space between the two - we ended up putting two 1.5 gallon buckets. One with Carrots and the other one with Broccoli. We drilled holes in the bottom of each of those and put them in those clear plastic drawers as well.
On the other side of the room we are using old CD Jewel Case Holders - with holes on the back/bottom for drainage - and put in the clear plastic drawers. So far - mostly - in these we are doing various greens! Lettuces - all different colors and kinds - and Kale. We hope to have these indoors for about 4 to 6 weeks and then harden them off and take them outside. We have TONS of other plans but are going to space them out. As for the set up indoors...we ended up reusing old wood and surfaces to make the "tables" and hugged them up to each window. I will keep you posted on any progress!
Thursday, January 2, 2014
Lengthy Post ~ Eventful 2014 Start!
LONG Post Alert!
Happy 2014! I've been VERY busy! In this post you will see a BUNCH of things that I have been working on! Starting with this Quinoa Dish from a few days ago! Unfortunately, I have misplaced the recipe! DRAT! But it does have various Spices, Quinoa, and Diced Tomatoes in it! I hope to post the recipe as soon as I locate it tho! Sorry about that!
Eeeeek!
Another Mini Project that I have been working on is this Mixed Media Artsy-Crafty Piece. I have but using various mediums and doing many layers over time. It's so thick right now it's much like a canvas texture-wise! I'm happy with the colors and texture and weight of it. I will be revisiting this again soon, I'm not sure if I will use it in Art Journaling or Wall Art - perhaps do a collage over top or maybe just add a phrase and Frame. I will keep you posted, tho!
As some of you know...I'm soooooo NOT a baker! But I'm TRYING to at least TRY! This was my FIRST attempt at Vegan Peanut Butter Cookies.
Yes...they are a little flat...but they tasted YUMMY and kept well.
Recipe:
1 1/2 C Bob's Red Mills Flour
1 tea Baking Soda
1 tea Soaked Chia Seeds
1 tea Vanilla Extract
1/2 C Earth Balance
1/2 C Peanut Butter
1/4 C Chocolate Peanut Butter
1/4 C Applesauce
1/2 C Brown Palm Sugar (Wholesome Sweeteners)
My Craft Room is a MESS!
And...I mean...a MESS! Beyond a MESS, actually! One of my many MINI Goals is to fix that. I start in on this a little bit yesterday!
You certainly can't tell from this photo!
What I will show you is HOW I started in on this MESS...
I started in with the PENS - Markers, Pencils, Water Colors, etc...
You name the utensil...it's HERE...
I like the way it turned out! I thought I would share it with you here...step by step!
There are 24 compartments - empty - for now...
We made these out of 10 feet of PVC Pipe.
We cut them into 5 inch "rings" for lack of better word, I suppose!
I really wanted a BACK on each one so it would STOP the items I put in there...and they wouldn't fall thru or fall out the back.
Decorative Duck Tape worked nicely. We covered about 75 to 80 percent of the back because I knew we wouldn't fill them with pens all the way to the top! I had two colors/patterns of Tye-Dye so I thought it would be cool to use 'em. It worked pretty well!
We had 4 compartments left over. As you can see here we could fit 5 across on each shelf for a total of 20 compartments. With the 4 left over ones we covered completely with the Tye-Dye Duck Tape and set them right-side-up on the top shelf for 4 more containers.
Yes...I already filled all 24 of them.
I love the way it turned out tho...but...I do have a LONG way to go on this Craft Room OVER HAUL.
Here's a closer look at this project.
I have more photos, too, but I think you get the picture!
I also love that this was reusing something and multipurposing.
Cost-Wise it made me smile, too! We figured it cost roughly 80 cents per compartment by doing it this way! YAY!
One of the main reasons my Craft Room is TRASHED is because I am a Pack Rat and have too much stuff! LOL
One of the items...
I've been saving and have been given LOTS of tins! This is just a small amount of the overall picture and problem. I want to make a mini goal to do a few a week...I will keep you posted on that.
Another item is this...
Yes...those are empty Plastic Soda/Pop Bottles.
I have in the past and I want to get back into working with them again.
I make Plastic Beads out of them...stay tuned for that in the near future, too! I posted about it a while back on my old Crafting Blog, too!
This is a photo of my 2 cats on New Years Eve.
Gabby on the left and Charlie on the right.
They stayed this close for about a half hour or so.
While I drank my smoothie that I posted about the other night!
And...finally...
Vegan Garlic Ranch Dressing! Woot!
2 Small Zukes
1/3 C Soaked Cashews
4 Small Dates
4 T Lemon Juice
2 Cloves Garlic
1 Shallot
1 T Parsley
Sprinkle to Taste Pink Himalayan Sea Salt
1/2 C Almond Milk (or to texture/consistency)
1/4 C Nutritional Yeast
This is WONDERFUL! I'm so happy with this flavor! What have you been working on in 2014 so far!?
Happy 2014! I've been VERY busy! In this post you will see a BUNCH of things that I have been working on! Starting with this Quinoa Dish from a few days ago! Unfortunately, I have misplaced the recipe! DRAT! But it does have various Spices, Quinoa, and Diced Tomatoes in it! I hope to post the recipe as soon as I locate it tho! Sorry about that!
Eeeeek!
Another Mini Project that I have been working on is this Mixed Media Artsy-Crafty Piece. I have but using various mediums and doing many layers over time. It's so thick right now it's much like a canvas texture-wise! I'm happy with the colors and texture and weight of it. I will be revisiting this again soon, I'm not sure if I will use it in Art Journaling or Wall Art - perhaps do a collage over top or maybe just add a phrase and Frame. I will keep you posted, tho!
As some of you know...I'm soooooo NOT a baker! But I'm TRYING to at least TRY! This was my FIRST attempt at Vegan Peanut Butter Cookies.
Yes...they are a little flat...but they tasted YUMMY and kept well.
Recipe:
1 1/2 C Bob's Red Mills Flour
1 tea Baking Soda
1 tea Soaked Chia Seeds
1 tea Vanilla Extract
1/2 C Earth Balance
1/2 C Peanut Butter
1/4 C Chocolate Peanut Butter
1/4 C Applesauce
1/2 C Brown Palm Sugar (Wholesome Sweeteners)
My Craft Room is a MESS!
And...I mean...a MESS! Beyond a MESS, actually! One of my many MINI Goals is to fix that. I start in on this a little bit yesterday!
You certainly can't tell from this photo!
What I will show you is HOW I started in on this MESS...
I started in with the PENS - Markers, Pencils, Water Colors, etc...
You name the utensil...it's HERE...
I like the way it turned out! I thought I would share it with you here...step by step!
There are 24 compartments - empty - for now...
We made these out of 10 feet of PVC Pipe.
We cut them into 5 inch "rings" for lack of better word, I suppose!
I really wanted a BACK on each one so it would STOP the items I put in there...and they wouldn't fall thru or fall out the back.Decorative Duck Tape worked nicely. We covered about 75 to 80 percent of the back because I knew we wouldn't fill them with pens all the way to the top! I had two colors/patterns of Tye-Dye so I thought it would be cool to use 'em. It worked pretty well!
We had 4 compartments left over. As you can see here we could fit 5 across on each shelf for a total of 20 compartments. With the 4 left over ones we covered completely with the Tye-Dye Duck Tape and set them right-side-up on the top shelf for 4 more containers.
Yes...I already filled all 24 of them.
I love the way it turned out tho...but...I do have a LONG way to go on this Craft Room OVER HAUL.
Here's a closer look at this project.
I have more photos, too, but I think you get the picture!
I also love that this was reusing something and multipurposing.
Cost-Wise it made me smile, too! We figured it cost roughly 80 cents per compartment by doing it this way! YAY!
One of the main reasons my Craft Room is TRASHED is because I am a Pack Rat and have too much stuff! LOL
One of the items...
I've been saving and have been given LOTS of tins! This is just a small amount of the overall picture and problem. I want to make a mini goal to do a few a week...I will keep you posted on that.
Another item is this...
Yes...those are empty Plastic Soda/Pop Bottles.
I have in the past and I want to get back into working with them again.
I make Plastic Beads out of them...stay tuned for that in the near future, too! I posted about it a while back on my old Crafting Blog, too!
This is a photo of my 2 cats on New Years Eve.
Gabby on the left and Charlie on the right.
They stayed this close for about a half hour or so.
While I drank my smoothie that I posted about the other night!
And...finally...
Vegan Garlic Ranch Dressing! Woot!
2 Small Zukes
1/3 C Soaked Cashews
4 Small Dates
4 T Lemon Juice
2 Cloves Garlic
1 Shallot
1 T Parsley
Sprinkle to Taste Pink Himalayan Sea Salt
1/2 C Almond Milk (or to texture/consistency)
1/4 C Nutritional Yeast
This is WONDERFUL! I'm so happy with this flavor! What have you been working on in 2014 so far!?
Tuesday, December 31, 2013
Celebrate With A Shake
I didn't plan this post but I figured...WHY NOT...it's time to celebrate! I'm ringing in the New Year with a SHAKE...both in movement and in this smoothie. I've been trying to use my Maca and Cacao more lately and thought tonight was the perfect time to try another one. Here's what's in this...
2 C Almond Milk
1 Banana
1T Maca Powder
1 tea Cacao Powder
2 T Agave
1 tea GoL Perfect Food Yerba Mate Energizer
Another goal of mine here was to use more than a half of a banana. I'm really trying to incorporate more of them in my diet and I have been working really hard to get past that HALF banana mark in my smoothies! Guess what!? Tonight I did it! Woot! I used almost an entire banana!
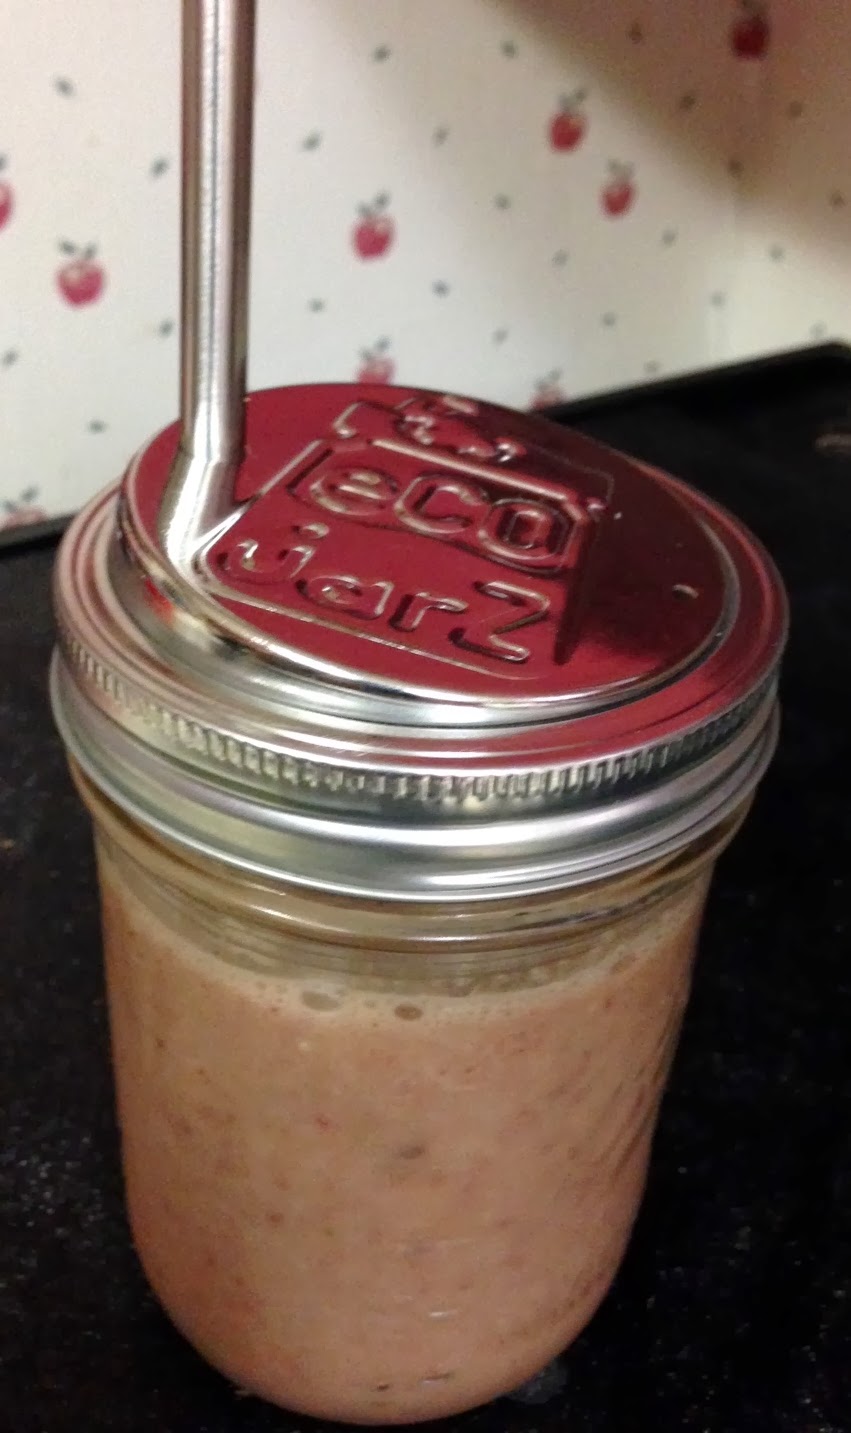
Also pictured is a Glass Straw from EcoJarz - my first time using the glass one and I'm LOVING it so far - AND - the glass jar - I'm reusing it from an Argo Iced Tea that I got a while back! I now have TWO of these and love the height and heavy-dutiness to it...I'm so glad I used them and they cleaned up nice!
Looking forward to a great 2014! Happy and Safe New Year to you all! Thanks for reading!
2 C Almond Milk
1 Banana
1T Maca Powder
1 tea Cacao Powder
2 T Agave
1 tea GoL Perfect Food Yerba Mate Energizer
Another goal of mine here was to use more than a half of a banana. I'm really trying to incorporate more of them in my diet and I have been working really hard to get past that HALF banana mark in my smoothies! Guess what!? Tonight I did it! Woot! I used almost an entire banana!Also pictured is a Glass Straw from EcoJarz - my first time using the glass one and I'm LOVING it so far - AND - the glass jar - I'm reusing it from an Argo Iced Tea that I got a while back! I now have TWO of these and love the height and heavy-dutiness to it...I'm so glad I used them and they cleaned up nice!
Looking forward to a great 2014! Happy and Safe New Year to you all! Thanks for reading!
Saturday, December 21, 2013
EcoJarz Wide Mouth Drink Top & Stainless Steel Straws, Strawberry Lemonade Smoothie, Mason Jar Madness!
I mentioned earlier this week I received a package in the mail of EcoJarz and I have to say I already LOVE them! The items I want to blog about today - specifically - is their Wide Mouth Drink Top as well as their Stainless Steel Straws! I'm sure you will be seeing a LOT of photos in the future of me using the EcoJarz Products and will surely try and mention each time I post!
In this first post you will see I did some water with Lemon Peels in it. This works 'swimmingly' because the peels can be right in there and won't fall out or splash you in the face!
Now...if you have visiting my blog before you know I use Mason Jars for SO MANY things! I'm so grateful to add this to my list of things to use Mason Jars with! They are so trendy, stylish, and FUN! And more importantly "GREEN"...they are VERY good for the Earth!
According to EcoJarz:
Now when it comes to the Stainless Steel Straws...I must say I think they are great, too! I've only ever had 1 heavy-duty re-useable straw and it was still plastic and I'm sure contains dyes and chemicals...but NOT this one! This is HARDCORE AWESOME! They are quite TALL, too, but I'm cool with that! They even have Straw Cleaners...something I have been lacking...and I'm so HAPPY that I can now clean my straws! Woot! A little bit more from EcoJarz about their Stainless Steel Straws...
I'm VERY happy with BOTH of these products! I love the way they look, too! Here's another look at the lid when I put it on the wide mouth Mason Jar. As you can see there are 2 holes. One for the Straw and the other for something I will be posting about down the road! Oh the suspense! LOL
The special tops sit right on top of the rim of the Mason Jar and then on top of that you put the ring on and secure! It's clever!
So far I've tried flavored water, juices, smoothies, and Flavored Soy Milk in it.
Here's a photo of the very first smoothie I did in it, too!
Recipe for this smoothie...
1 C Frozen Strawberries
1 C Coconut Milk
1/2 Scoop of GoL Apple Flavored perfect Food
1 Meyer Lemon
1 tea Hemp Hearts/Hemp Seeds
It was simple and flavorful!
Here's another look at the Smoothie itself! I took the peel off the Meyer Lemon and threw the whole thing in there.
Usually Meyer Lemons don't have very many seeds present - but this one apparently DID. That's ok...it was still yummy! I just had to blend it for longer.
Another optional addition for this would be Banana - I still have a few other frozen - I just didn't feel like the sweet at the moment...I was looking for a Strawberry Lemonade type flavor this time around.
I hope you enjoyed reading about these EcoJarz Products! I know I'm having a BALL with them! I am sure to be posting LOTS more in the very near future about their products, too, so stay tuned!
In this first post you will see I did some water with Lemon Peels in it. This works 'swimmingly' because the peels can be right in there and won't fall out or splash you in the face!
Now...if you have visiting my blog before you know I use Mason Jars for SO MANY things! I'm so grateful to add this to my list of things to use Mason Jars with! They are so trendy, stylish, and FUN! And more importantly "GREEN"...they are VERY good for the Earth!
According to EcoJarz:
Our wide-mouth stainless steel lids are entirely non-reactive and can be used with hot or cold beverages without any worry of chemical leach. They are completely BPA and phthalate free. We recommend washing your new Ecojarz lids thoroughly with soap and water before use. Dry your stainless steel lids and jar bands well after washing and store in a dry place.
- Perfect for all your Pint-and-a-half sized sipping
- Sleek stainless-steel style for your wide-mouth to-go cup sets
- The first stainless steel wide-mouth drinktop 3-pack on the market
You can choose to ship your lids in their lovely retail packages (pictured on the left) or save paper and select “Ship WITHOUT Retail Package” from the drop down menu at the right.
A “Jar Band” is the metal ring which threads onto a glass jar and is necessary to attach an Ecojarz top. It works just like a canning jar lid. If you already have wide mouth jar bands you are good to go, but if not you can add them to your order for just $2.50 using the second drop down menu on the left. Add 3 stainless steel straws for only $8.50, or 3 sets of straws and bands for $11.
Now when it comes to the Stainless Steel Straws...I must say I think they are great, too! I've only ever had 1 heavy-duty re-useable straw and it was still plastic and I'm sure contains dyes and chemicals...but NOT this one! This is HARDCORE AWESOME! They are quite TALL, too, but I'm cool with that! They even have Straw Cleaners...something I have been lacking...and I'm so HAPPY that I can now clean my straws! Woot! A little bit more from EcoJarz about their Stainless Steel Straws...
Disposable straws are so out-of-style; all the classiest hippies sip through stainless steel! For a glamorous green juice on the go, show how much you love the earth and add some bling-bling, stainless steel sustainability to your drink.
- Strong, durable, reusable drinking straws
- Elegant shape with small permanent bend
- Easy to clean
- Work with all Ecojarz lids
Featuring a sleek and slender design, our drinking straws have a slight bend that resemble the familiar flexible disposable straws (though ours are not flexible). Best for sipping liquids like fresh-squeezed juice or tea, this drinking straw fits both our silicone and stainless steel Ecojarz lids. If you need a great straw that can handle thicker drinks like smoothies check out our Smoothie Straws.
We recommend to wash your new stainless steel drinking straw thoroughly with soap and water before use. Cleaning your drinking straws is easy with our excellent stainless steel straw cleaners!
I'm VERY happy with BOTH of these products! I love the way they look, too! Here's another look at the lid when I put it on the wide mouth Mason Jar. As you can see there are 2 holes. One for the Straw and the other for something I will be posting about down the road! Oh the suspense! LOL
The special tops sit right on top of the rim of the Mason Jar and then on top of that you put the ring on and secure! It's clever!
So far I've tried flavored water, juices, smoothies, and Flavored Soy Milk in it.
Here's a photo of the very first smoothie I did in it, too!
Recipe for this smoothie...
1 C Frozen Strawberries
1 C Coconut Milk
1/2 Scoop of GoL Apple Flavored perfect Food
1 Meyer Lemon
1 tea Hemp Hearts/Hemp Seeds
It was simple and flavorful!
Here's another look at the Smoothie itself! I took the peel off the Meyer Lemon and threw the whole thing in there.
Usually Meyer Lemons don't have very many seeds present - but this one apparently DID. That's ok...it was still yummy! I just had to blend it for longer.
Another optional addition for this would be Banana - I still have a few other frozen - I just didn't feel like the sweet at the moment...I was looking for a Strawberry Lemonade type flavor this time around.
I hope you enjoyed reading about these EcoJarz Products! I know I'm having a BALL with them! I am sure to be posting LOTS more in the very near future about their products, too, so stay tuned!
Tuesday, December 17, 2013
Peer Pressure Exists For Adults, too! Bento Box...Here I Come!
Yes...Peer Pressure exists for Adults, too! A while back Opal blogged about Bento Boxes and I was intrigued! I think for days (or even weeks) after reading her post I thought Bento Boxes were a 'special box'...but after doing some online research I found out it can be any box, really, because Bento Box literally means "Meal in a Box" or "Boxed Meal". (I don't know WHY I assumed that - Opal didn't mention that it was a 'special box' in her post! Eeeek! Silly Me!) To further the Peer Pressure I randomly stumbled upon a few bloggers who focus on Bento Box Blogging! How Trendy! I was hooked and I didn't even have one...YET! The only thing is since I don't have kids I don't think I would do the super creative CUTE and FUN looking ones that I have seen online thus far. Instead my REAL reason for caving is because I tend to bring leftovers or a dish I made the night before for my lunch the next day but I want to focus on incorporating more foods for a compete meal...and not just eating a whole bowl of one thing, I guess. Call it a mini goal if you will!
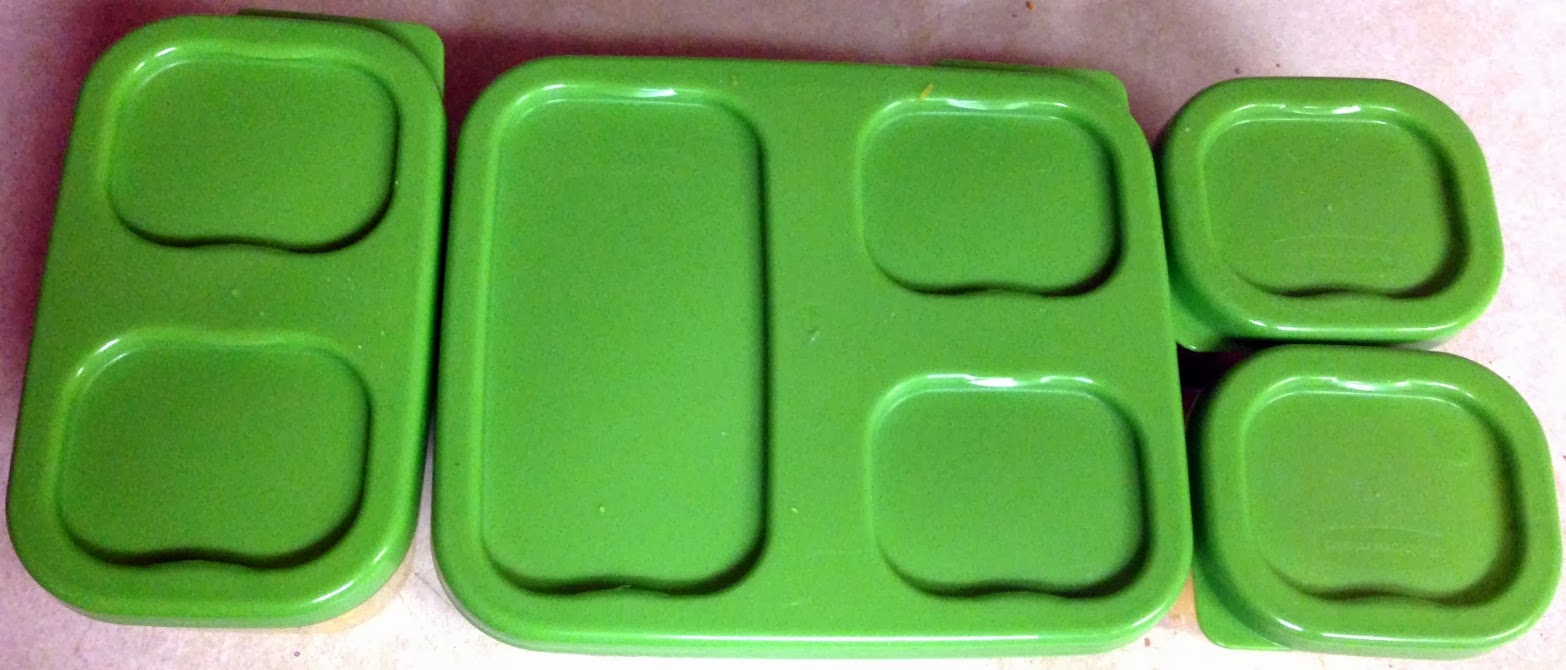
Well, this past weekend I was able to locate a great deal on a Bento Box of sorts that would fit my needs. I didn't want to spend a lot of money on one until I knew more about them and wanted to see if I would use it as much as I hope. I ended up finding TWO of the kits along with an insulated bag/carrier for about $30. Most of the ones I saw online were $30 for 1 of them and with less compartments. I figured IF I really got into it - I could always buy another one...a more involved one, you know!? So here is what the first one looks like! Along with my very first assembled Bento Box attempt! Woot! Starting at the top you will see 1/2 of a Tomato - diced, with Hemp Hearts/Hemp Seeds sprinkled on top. They are marinating in Balsamic Vinegar as well. To the right...simple Mandarin Oranges...the large container - at the top as a section of sandwich spread LEFTOVERS I made (more on that later today or tomorrow), below that is small triangles of Whole Grain Pita Bread, then in the center is leftover Pinjur that I finally finished, more triangles, and leftover rice towards the bottom. You may also see 4 small Apple Cinnamon "chips" in each corner leftover from my dehydrating attempts. Then on the other side is Corn that I added just a little bit of Basil Pesto Grapeseed Oil to with Cashews outlining the top. It was interesting because the moisture from the corn was soaked up by the cashews and they tasted wonderful!
I think this may have been RubberMaid Brand and if it wasn't it was a close knock-off of the brand. I also bought a salad kit one that I will most likely be blogging about tomorrow or the next day! Also as a mini goal I hope to blog about my adventures with Bento Boxes and Meal Portions often so you will probably see a lot more of these types of posts. Another thing I like about this set I bought is that the little compartments snap into place. It also fits nicely into this insulated bag carrier I found in the same row at the store. NOT Pictured here but included in each set is a freezer pack that snaps to the bottom (or top). As you can see in this photo there is plenty of room left over for additional items in the bag! This made me happy because I have been struggling with remembering to eat breakfast and I think I can account for that, too! So far I am very happy with this purchase as well as my first attempt!
Here you can see my Oatmeal packets (I just add water) and fruit cups. I know store bought isn't the best - fresh is - but I had them and am trying to use them and not waste them plus they are good in a pinch!
Apparently I had an insanely productive weekend because I have about 5 other things to post but I think I will wait until tomorrow!
Be sure to keep scrolling because I have a few other posts that might be of interest, today! Question of the Day...what are some of your favorite Adult "Brown Bag" or "Bento Lunches" for the office and/or workplace?
Well, this past weekend I was able to locate a great deal on a Bento Box of sorts that would fit my needs. I didn't want to spend a lot of money on one until I knew more about them and wanted to see if I would use it as much as I hope. I ended up finding TWO of the kits along with an insulated bag/carrier for about $30. Most of the ones I saw online were $30 for 1 of them and with less compartments. I figured IF I really got into it - I could always buy another one...a more involved one, you know!? So here is what the first one looks like! Along with my very first assembled Bento Box attempt! Woot! Starting at the top you will see 1/2 of a Tomato - diced, with Hemp Hearts/Hemp Seeds sprinkled on top. They are marinating in Balsamic Vinegar as well. To the right...simple Mandarin Oranges...the large container - at the top as a section of sandwich spread LEFTOVERS I made (more on that later today or tomorrow), below that is small triangles of Whole Grain Pita Bread, then in the center is leftover Pinjur that I finally finished, more triangles, and leftover rice towards the bottom. You may also see 4 small Apple Cinnamon "chips" in each corner leftover from my dehydrating attempts. Then on the other side is Corn that I added just a little bit of Basil Pesto Grapeseed Oil to with Cashews outlining the top. It was interesting because the moisture from the corn was soaked up by the cashews and they tasted wonderful!I think this may have been RubberMaid Brand and if it wasn't it was a close knock-off of the brand. I also bought a salad kit one that I will most likely be blogging about tomorrow or the next day! Also as a mini goal I hope to blog about my adventures with Bento Boxes and Meal Portions often so you will probably see a lot more of these types of posts. Another thing I like about this set I bought is that the little compartments snap into place. It also fits nicely into this insulated bag carrier I found in the same row at the store. NOT Pictured here but included in each set is a freezer pack that snaps to the bottom (or top). As you can see in this photo there is plenty of room left over for additional items in the bag! This made me happy because I have been struggling with remembering to eat breakfast and I think I can account for that, too! So far I am very happy with this purchase as well as my first attempt!
Here you can see my Oatmeal packets (I just add water) and fruit cups. I know store bought isn't the best - fresh is - but I had them and am trying to use them and not waste them plus they are good in a pinch!
Apparently I had an insanely productive weekend because I have about 5 other things to post but I think I will wait until tomorrow!
Be sure to keep scrolling because I have a few other posts that might be of interest, today! Question of the Day...what are some of your favorite Adult "Brown Bag" or "Bento Lunches" for the office and/or workplace?
Subscribe to:
Posts (Atom)


.jpeg)


.jpeg)
.jpeg)
.jpeg)
.jpeg)
.jpeg)
.jpeg)
.jpeg)
.jpeg)
.jpeg)
.jpeg)

.jpeg)


.jpeg)